The following guide is meant to be a resource for new to intermediate painters as much as it is an exercise in self reflection; a compilation of personal painting knowledge. I do
not claim to be a master painter (hence the post title).
In the last month or so I have discovered many new stages to miniature painting. This is a result of me breaking away from my
'paint an entire army right now' mind set. Taking a hiatus from applying the same colour scheme to a horde of carbon copies ad nauseam can be an enlightening venture for any miniature gamer who seeks to deepen their well of painting knowledge.
That is the miniature that I will be using throughout this guide. The image is of a Worgen from a wargame called Confrontation. It was produced by a company called Rackham which collapsed in 2010. The mini pictured above was
not painted by me; however that is one hell of a paint job, and I will look to it for inspiration.
Before I dive into the nitty-gritty of taking a pile of pewter and turning it into a snarling, axe-weilding face-eater I would like to say a few words about painting philosophy. When it comes to any type of
art stagnation can be an artists most insidious enemy. Unless you are a professional commission painter there are always more techniques that you can discover, or gain a better mastery of.
Expecting your next mini to look better than your last just because you tried
harder is foolhardy. If anyone reading this is attacking each miniature with the basecoat, ink-wash, dry-brush technique then heed this: In order for you to improve your painting you NEED to discover some more advanced brush techniques.
Glazing: If you're under the impression that glazing involves brushing on Games Workshop "Glaze" paints then you're only half right. I guess technically that is 'glazing', but it's not what the pros are talking about. For anyone unsure what glazing is:
Painting Buddha. I've linked to this guy on this blog before, and for good reason. More can be learned from watching that 24 minute video than could be gained from practicing in a vacuum for 12 months.
Cross Hatching & the Illusion of Texture: Recently while painting a D&D miniature for a friend I was stumped by yet another cloak. I've painted countless cloaks in my time; they all look good, but none of them look GREAT. I thought I might attempt something a little different.
I didn't want to just create contrast by making the highest ridges bright, and the recesses dark. I attempted to build superficial texture on top of said contrast. I believe this adds to the interest of the cape.
Non-Metallic Metals & True Metals: For anyone that doesn't know the difference: True Metals are paints which contain little flecks of reflective pigment which create the illusion of a metal surface (e.g. Games Workshop's
Bolt Gun Metal or Vallejo's
Gun Grey). Non-Metallic Metal is a painting technique that should be employed by every miniature painter at least once. It is the technique of making a surface appear to be metallic without the use of true metallic paints. Below Left: My attempt at creating contrast using true metallics. Below Right: My attempt at Non-Metalic Metals (NMM)
 |
| Note how boring the cape is v.s. cross hatched one |
If you are a person who doesn't appreciate the appearance of NMM, but has never attempted it I highly recommend giving it a go. The act of attempting NMM is the greatest exercise in creating contrast available to you as a painter, and that's what this whole thing is all about!
A Note on Materials
The title of this post is: 'a guide to painting METAL miniatures' and with that comes a lot of extra work in comparison to some companies hard plastic kits. Here are some things that you aren't necessarily going to NEED, but will definitely WANT when attacking little pewter mans:
1.) A Pin Vice!!!! Metal miniatures are NOTORIOUS for breaking apart, and a big heavy sucker like this Worgen will positively break apart on you if you don't pin his bits together. You don't need to spend an arm and a leg on this thing; they're actually pretty cheap if you shop around a bit.
2.) Copper Wire! Once you've drilled your holes you're going to need something to stuff them with. Also dirt cheap. Available at any hardware store.
3.) The best super-glue in the world. Hot Stuff's Super T! If your Friendly Local Game Store doesn't carry this stuff tell them to stop being so lazy and start stocking proper modeling supplies!!!
4.) Some primer. Have you recently spent 20$ on GW or Army Painter primer? Go ahead and give yourself a slap for me. Any one who tells you that regular plastic-bonding primer won't do the job is either lying to you (presumably to make a buck), or is simply ignorant.
Anyone who has done the research (me), and has seen Rust-Oleum's Ultra Cover compete side by side with P3 primer will tell you that shit does EXACTLY the same job. Regular hardware store primer is not going to bury your detail, or stay sticky forever. Make sure to apply at a distance of (atleast) 10". You only need one coat.
5.) Gloss Cote and Dull Cote. This stuff is positively essential when working with pewter. Do you want your beautiful paint job that you've sank your precious time into chipping off at precisely every delicate highlight? I thought not.
Okay, that's it for metal specific materials. Now on to the rest of the materials that I use when painting!
1.) Wet palette. If you're painting miniatures, and you're not using an airbrush then you should be using a wet palette. If you're not then one of two things are true: You're in your first 3 months of this miniature painting thing, or you're doing it wrong. Google wet palette if you're unsure of just how to make one (parchment paper, Tupperware & water)
 |
| Mine needs a new sheet! |
2.) Brush Cleaner. Are you tired of your brand new ( and expensive) paint brushes losing their tips after your 4th or 5th painting session? Well my friend there are a few things you can do to prevent this travesty from occurring again. First of all try not to let paint get into the ferrule of your brush. When you're adding paint to your brush you can see the wetness/pigment climb up then length of the bristles. If this pigment gets all the way up to your ferrule and subsequently dries you're already fucked.
Tip number two: clean your brush often using some store-bought brush cleaner. If it doubles the lifetime of even a single brush then it's paid for itself.
3.) Basing Materials. On the Worgen I've used ballast (from a hobby store) and cork (dollarama). You can use your imagination when it comes to basing materials. Here is a particularly awesome video on building a base up from step one:
Samson Minis
 |
| Ballast |
 |
| Cork |
4.) Paints. I'm afraid that I have to say it: you're going to need an arrangement of paints to bring you mini to life! I've attached a photo of Administratum Grey because it is (in my opinion) the single most useful colour for creating a subtle gradient of other colours. Instead of adding straight white to your base colour, or using the GW technique of Base-Layer-Highlight, try adding administratum grey to your base, graduating to Pallid wytch flesh, and then white (scar).
5.) A brush you like, and a brush you love. Use the brush that you like to move paint from the pot to the wet pallet, and mix with water. Use the brush that you love (nicest tip) to add the paint from the palette to the miniature.
Pinning
Here is a super-quick picture guide for the uninitiated on pinning.
 |
| Add paint where I'm pointing with the pin, dry fit parts, drill at paint on both pieces |
 |
| Add a half-centimeter of copper |
 |
| Add Super-T glue and hold together for 5 seconds. Boom. |
A few Notes on Planning
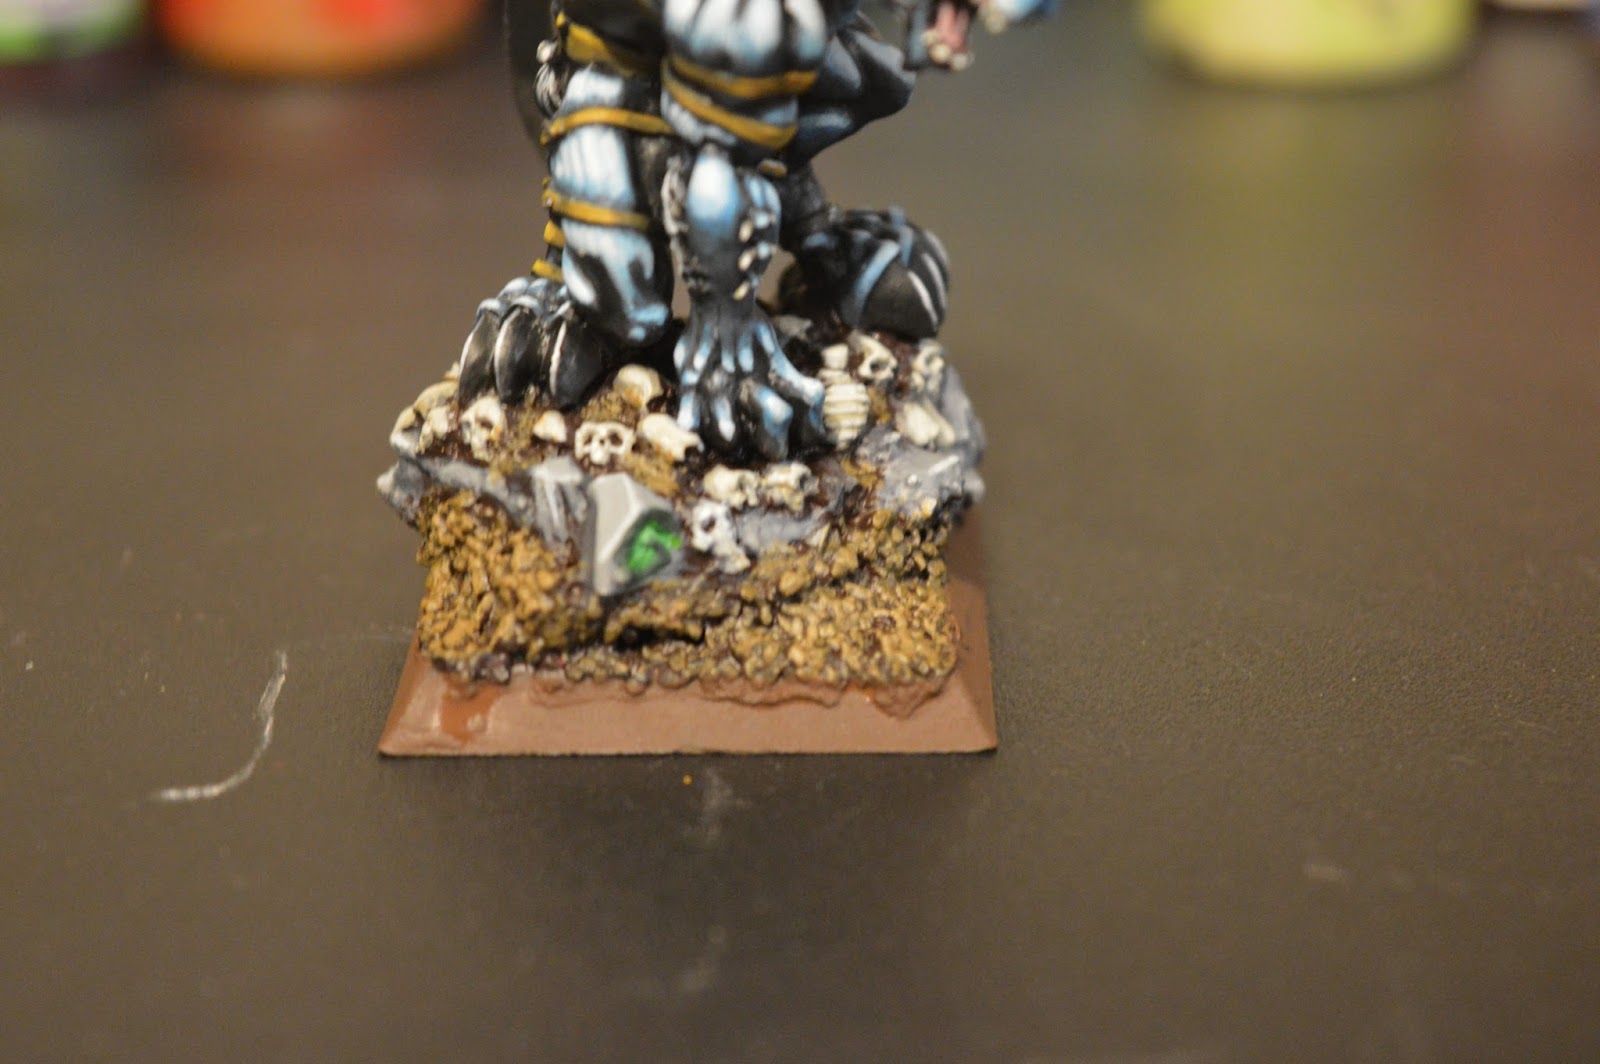
Okay with all of that out of the way we come to a discussion on devising a colour scheme, and brainstorming basing ideas. For this miniature I immediately noticed the 'built-in' base. If you take a look at the picture at the very top of this post (I know a long way up) the Worgen is standing on some pre-modeled stones w/ skulls 'n shit. I would like you to also notice that this sculpting doesn't take into account the size of base it is packaged with. The stones hang over the edge of the square. This didn't sit well with me.
I decided to build the stones up by tracing out and gluing two pieces of cork to each other. I then glued said cork underneath the stone. After shaving it with a hobby knife the extended stone now narrowed back into a shape which would not protrude the defined edges of the base. A little wood glue, ballast, and some primer leaves us with something that looks like this:
 |
| It might look like a mess now, but with some paint this will look much more complete than the base pictured above. |
With the gluing, basing and priming out of the way comes the
fun part!
Get Inspired
There are two essential parts of a painters inspiration. Part one we already talked about (discovering new techniques to try out). Part 2 is to look at other artist's renditions of your subject and pick out a few pieces that you like (emphasis on colour here). For instance if you're painting a zombie miniature you might find yourself watching an episode of the walking dead. Look through art work
and miniatures!
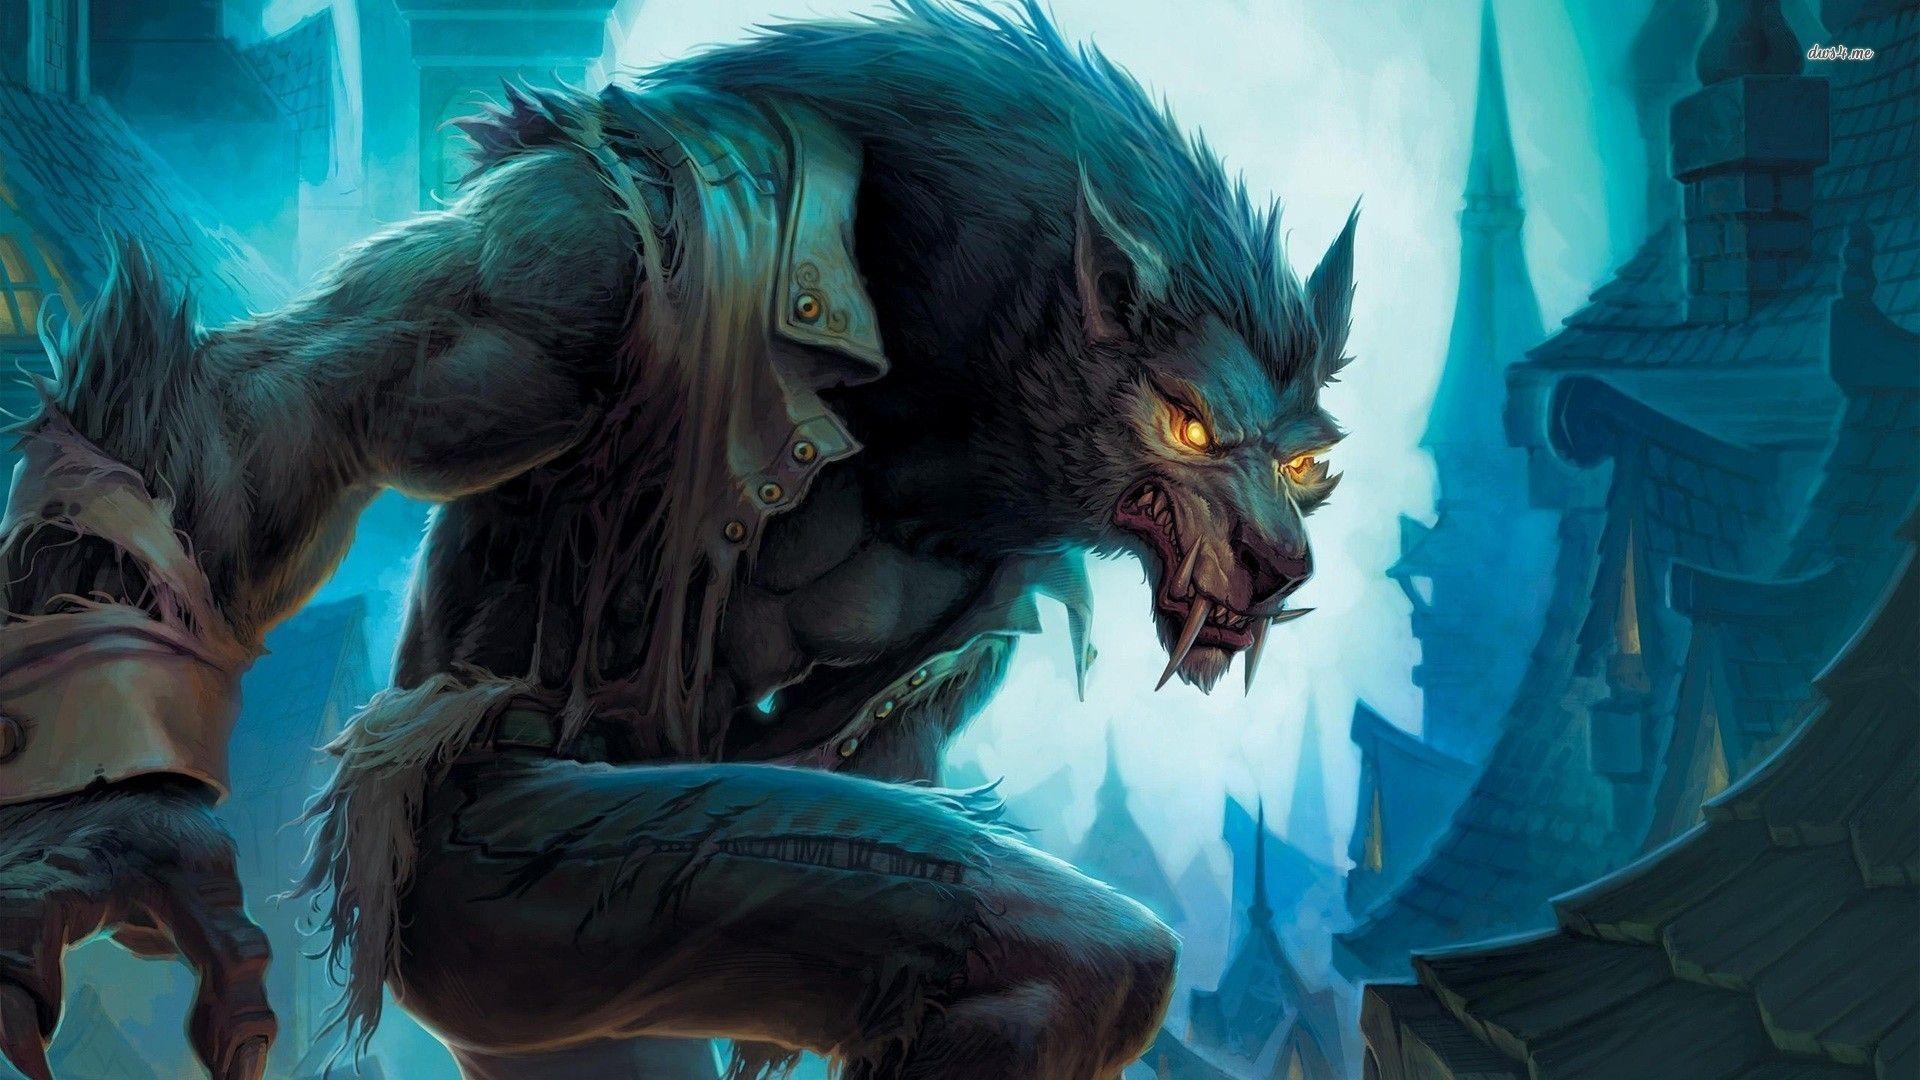
Most of the photos I've rummaged through use a cool palate with red and yellow accents. I'm noticing a lot of strong shadows; I'm getting the feeling that to create a menacing looking Worgen i'm going to want to use a lot of black in the recesses and undersides.
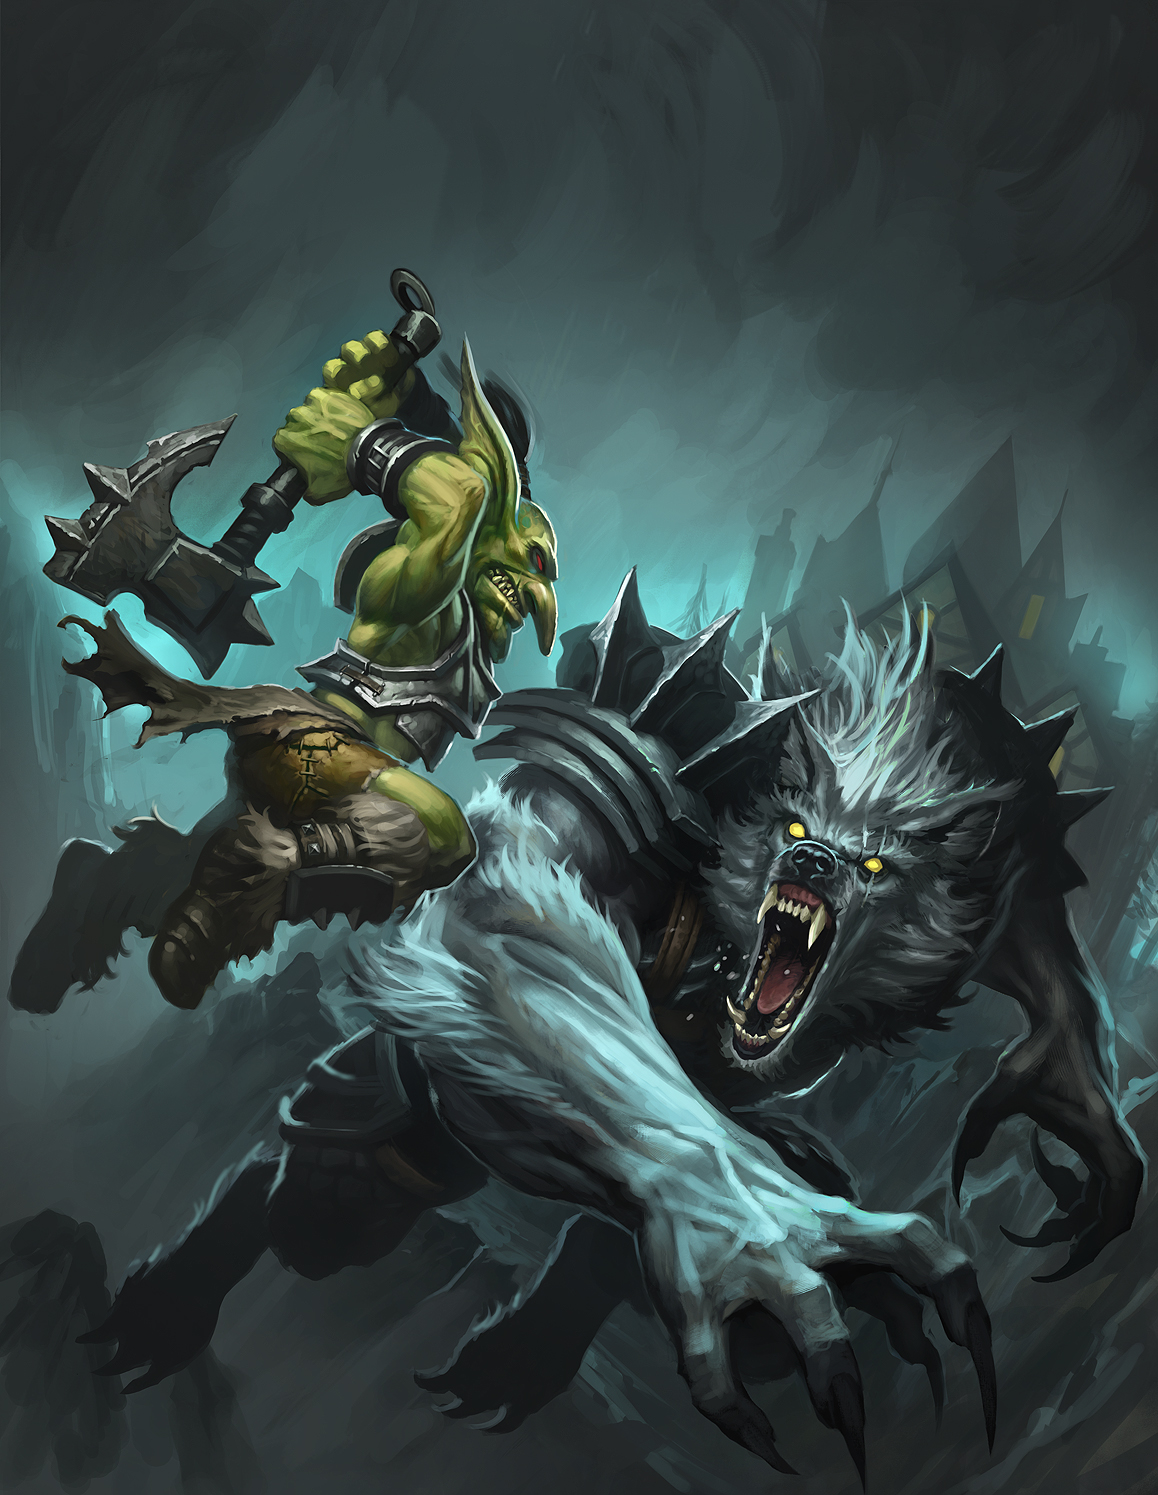
The third image linked is especially well painted. At first glance I thought it was a 2D painting on a canvass. Even though the 3rd photo is the most technical paintjob, I am personally most taken by the 5th image of the ice-white werewolf fighting it out with the acrobatic goblin.
Based on the 5th image I'm going to go for a a super cool palette. Black armour - Dark blue to bright white gradient for skin - Black nails & snout - yellow eyes - perhaps yellow embroidering on the axe and armour. The fur is a place of particular importance on this model. Ultimately I have decided to go with black hair to contrast the white skin; we will see if this pays off in the end.
I will consider the colours I want to use on the base after I have finished the Worgen itself because I will want to use that opportunity to create the maximum amount of contrast. If the Worgen is overall quite bright then the base will have to be dark and vice versa.
Lets Begin
My first tip for actually painting a model is to start at the inner most part of the figure, and then move outwards. For instance in this case I will want to paint this area in which I'm pointing to before moving outward.
 |
| All right you caught me, I added one more coat of primer after pinning |
However I am getting slightly ahead of my self. Before painting any of these areas to completion I am going to need to block out all of the areas in their base coats
because this is a
metal model. If I was dealing with a plastic fig I would just start with an area, paint it to general completion, and then move on to the next part. You will see why this is the case in the next step.
Here we are with the base coats drying. I went with Rhinox Hide on the base and Dark Reaper for the skin. Everything else is fine as black.
Now it is time to bust out your gloss coat. Protip: Running this stuff through your air brush will yield MUCH nicer results than applying with a brush. Using a brush can lead to clumping and can actually pull your primer off if you're not careful. Use a brush you hate because it aint gunna make it. Water down 1:1 with thinning medium or water. Protip #2: If you run it through your airbrush then clean it thoroughly immediately after use. This stuff can be nasty.
This is how it looks after the gloss coat. I applied it with a brush for the first time (have previously only used airbrush). I am far from happy with the results; however if you skip this step you WILL experience excessive chipping.
 |
| Here she is after Gloss coat and Dull coat |
 |
| After Dull coat I applied another thin layer of original base coats. |
 |
| Building up small highlights in the 'dark underbelly'. Since my light source is directly above the figure the hunched over posture is going to cause the stomach area to be much darker than areas on top. |
 |
| Attacking the straps in chest area with some XV88 brown, building contrast with straight black and highlights with averland sunset. |
 |
| Contrast starting to build. Remember: many thin layers! |
 |
| Here I am starting on the metallics in the area - finishing all of the details before moving out. I repeat: start at the inside of the model and then move outward. |
 |
| Building metal contrast with thinned black and Runefang Steel. Also added some nips and a buckle! |
 |
| Started on the bone croissant. |
 |
| Metal loin cloth painted with boltgun, black and runefang. Bones are done with Karak stone, XV88, black and white! |
 |
| Starting on the skin. The original idea outlined above was to have white skin with lots of dark blue shadows. Built up with Telcis blue, Lothern Blue, Pallid wytch flesh and any old white. |
 |
| Moving on to the toes |
 |
| Getting a feel for the light source. |
 |
| Starting from a clean slate at the beginning of the model, this is what my wet pallet looks like at this stage. |
 |
| Front view of skin progress |
 |
| Back definition completed. |
 |
| The face is one of the brightest areas of the model as it is directly under the light source, and is a place of high interest to the viewer. |
 |
| Starting to build contrast on all of the straps (arms, legs and body). Contrast built with XV88, Sunset, Black and Gray! |
 |
| Dice pouches painted with administratum gray, black & white. |
 |
| Mouth was done with Khorne Red, black & white. |
 |
| Metal studs painted with gunmetal, runefang steel and underlined with black lines. Started adding some gray to the hair at this stage. |
 |
| Hair build-up. |
 |
| Hair is finished off with some white highlights. |
 |
| The accents I wanted to go for were red, yellow and MAYBE a little green (because of the goblin in the photo above). Thus the braids ended up red built with Evil sunz scarlet, black & white. |
 |
| The eyes are blocked out in averland sunset, then a highlight yellow on top. After that I dot the pupils and go back over the eye lids with skin tone. Earrings done in the same manner. |
 |
| Starting on the axe. Three SUPER thinned down coats of gunmetal are added to the parts that are going to be silver. |
 |
| For this part I thinned some black down to a watery consistency. A trick for metal objects is to find a line, and then high light opposite ends on either side of that line. It's hard to explain but hopefully it will be self evident here. The thinned down black is added to the bottom left and top right of the blade. |
 |
| Then it is added again. |
 |
| And again. |
 |
| Annnnd again. |
 |
| Okay couple more times. |
 |
| Starting to look proper. Don't forget you have to do the other side too! |
 |
| Okay I'm quite happy with this. The brighter ends and edges are highlighted with Runefang steel. |
 |
| Since the rest of the accents are yellow I figured gold would make a good fit here. |
 |
| Highlights on the shoulder and haft of the axe are done with black, gray and white. After applying a line of gray add a thinner line of white. Then go over all of it with thiiiin black. Finagle around with it until it looks right. |
 |
| Here she is all ready for a good basing. |
 |
| Current state of wet palette. I don't know if this is helpful for anyone, but I thought I would record it just in case. |
 |
| Base was a quick 'n dirty job with some Karak stone, XV88, Gray white and black. |
 |
| I ended up paying homage to the goblin in the inspiring picture above by adding a slight green glowing effect to the runes sculpted on the base. |
 |
| And here she is all finished off and ready for some glamour shots. |
 |
| What's that behind your back? |
 |
| I forgot to mention that the claws are just black, with a gray line down the center with 1 pure white highlight. |
 |
| Birds eye view of the do. |
Okay that's it! Phew. If you've actually made it to the bottom of this post then I must say thank you for reading! Hopefully you've learned something, whether you're a newbie or a seasoned grognard; I know that I certainly have.
If you did find this post helpful then please leave a message in the comments saying which figure came out better: the one featured at the very top of this post, or mine? Who wore it better!?


Really helpful, thank you very much!
ReplyDeleteIf I don't have an airbrush available to me, would you reccommend using the spray versions of dullcote and glosscote, or would I be better served slogging it with an old brush?
DeleteYou're very welcome! I have no experience with the spray-on stuff, but I have heard some very mixed reviews. However those reviews were coming from people who apply it after finishing their entire paint job, so for this sort of thing I would say why not give it a try? I've heard that sometimes depending on the humidity dullcote can leave a 'foggy' look. Unless you're on an extremely limited budget there is no harm in seeing which one works best for you!
DeleteExcellent, I'll give a shot. Thanks a bunch.
Delete